Sunday, July 11, 2010

Fence Line Timbers Complete!


Over the last couple of weeks I have been working on building and installing the arms that will support the rail bed on the big posts along the east fence. From the standpoint of the railroad, this is the southernmost section of the line - from Cornelia to the outskirts of Demorest, or about five miles. In the real world this will support the first 55 feet or so of track and structures.


This last photo shows the crossbeam that will support the rail beds in place. The carriage bolts allow exact adjustment of the the beam to correct height and to keep everything level. I expect this to be helpful as all of this wood ages out, with the inevitable twists and torques and warps.

The goal is to have all this in place and the track laid before the end of August so that we can be certain the track is at its maximum length when considering thermal expansion.

Sunday, May 30, 2010

More on the TFRR's Passenger Train

To me there is nothing that speaks more directly of the golden era of railroading than steam engines pulling "old varnish" passenger trains - wooden coaches and baggage/mail cars with open front and rear platforms, clerestory windows and a potbelly stove in one corner. On my imagining of the TFRR the passenger business is stronger than ever - a mix of public transportation, tourist excursions, and seasonal/event specials in an alternate universe where the crude experience delivered by the gasoline engine remains a distant second to the comfort and convenience of rail travel in the mind of the public.


So far the TFRR passenger fleet consists of these two cars: a baggage/mail car and an observation car, which is a passenger coach or lounge car with a bit of a fenced in platform out the back door. This platform would be the place for passengers to see the scenery roll by while moving and politicians to make speeches while stopped.


As noted in the previous post, both of these were gotten for a song on ebay, leftovers from the vast fleet of forsaken "Big Hauler" Christmas-tree-friendly train sets made by Bachmann Trains. I really like the look and weight of these cars. They don't the museum quality detail of cars by Accucraft or AMS, but do not succumb to what to my tastes (and for the TFRR) is the overly-cute look of the shortie passenger car fleets offered by LGB and Hartland Locomotive Works.

The black and white photos I've seen of prototype TFRR passenger cars give no hint of their actual color, so both of these were painted with this yellow and brown paint scheme that I imagined the railroad might have had or adopted.

At some point I'd like to add two more coaches to this train, then "name" each of the three passenger cars for a waterfall found in each of the counties where the TFRR ran: Panther Creek Falls (Habersham), Minnehaha Falls (Rabun) and Big Laurel Falls (Macon). Needless to say, they all also need basic lettering.

My observation car started in a maroon "New York Central Lines" paint scheme with a broken rear step and deck.


Here's the "after" shot of the same car, where you can see that rather than repair the broken step I removed both rear steps altogether to increase the space on the enclosed observation deck. Since I'd removed the steps there was no need for the grab irons, so I removed those and filled the mounting holes with wood putty.


I also simplified the enclosing rail, trimming out all the diagonals and painting them green. On the very back I carefully trimmed out the right mix of struts to leave it spelling out a blocky "T" and "F" - a small short line railroad's answer to the fancy illuminated tail signs of the big, wealthy railroads. But I'm not completely satisfied with the yellow paint used for the "TF", as it tends to disappear against the yellow background of the car's wall when viewed from the rear.


Three passengers can be glimpsed through the windows, waiting for the train to leave the station. It amazes me how a few figures can instantly bring some life to the scene.


The interior got thin washes of brown paint that matted out the shiny plastic look, plus brought out wood grain cast in the floorboards. There was a large plastic blob left in the center of the car by the injection molding process. Rather than carve this thing out, I drilled a hole in the center and painted it gold, producing what I hope resembles a spittoon at first glance.


Here's the baggage/mail car.


I plan to model one end as a Railway Post Office (RPO), which was a special kind of mail car in which a postal agent actively sorted the mail picked up as the train rolled down the track, providing same-day mail service to the towns directly served by the railroad. (To learn more about the operation of RPO's, click here for a great 1936 documentary on the mail trains on the London, Midland and Scottish Railway.)

The other end will be modeled as a mix of passenger bags, boxes and the various mix of other items that was transported by the railroad - anything from a crate of chickens to a bundle of apple tree seedlings.

This car is also missing some handrails on one end. At some point I would like to replace all of the rinky-dink plastic handrails and grab-irons on these cars with some simple brasswork - tubing and/or solid wire.

Still to do on these cars:
* All lettering!
* Interior details of baggage/mail car
* Complete Kadee coupler conversion. Right now there is a motley mix of one Bachmann coupler, two body-mounted Kadee 830's and a truck mounted Kadee 909 that looks grotesque on the end of that long arm.
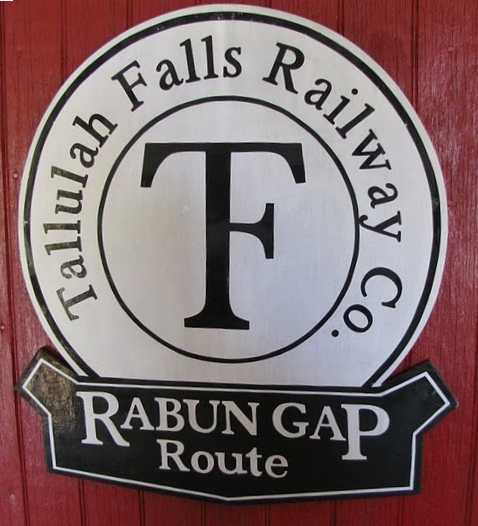
* Finally, I'm hoping to win permission to use the cool reimagined TFRR corporate logo that you can see at the museum in Rabun Gap between the doors on the baggage/mail car. Or I may modify it into my own version by adding some simple mountain peak outlines to the inner circle.

Friday, May 21, 2010

Into the Great Outdoors


The first foray for Baldwin Ten-Wheeler #77!


The "roadbed" is a pressure treated 2x6 connected to the house at one end with one inch "L" brackets and floating over the handrail of the deck on a pair of eight inch carriage bolts. Using the carriage bolts allowed flawless adjustment of the board at dead level.


The same technique will be used to support all the other trackwork around the deck and the portion of the track that will hang on the fence, meaning it should be easy to get ALL of it perfectly level for the whole area around the big oak tree. I like that the use of the same 2x6 construction from which the deck is built will help the railroad to feel integrated with the existing structures rather than merely perch atop them.


Here's the inside view of the First Class train pulling out behind #77, what was often called the "milk run" on small railroads - the out-and-back trip to deliver passengers, mail and packages. Both this baggage car and this passenger car with the rear observation deck were bought for a pittance on ebay. They are both refugees from the widely available Bachmann "Big Hauler" sets that appear around Christmas time. In the black and white photos it is impossible to tell what color these cars really were, so I repainted these in this yellow and brown paint scheme that I invented as being the "house" scheme for my version of the TFRR.


The whole indoor train yard is built to slide out to allow maintenance access to the washer and dryer underneath. That means that a gap in the track is also a necessity, meaning that the indoor board and the outdoor plank had to be as leveled and positioned as possible so that incoming and outgoing trains will cross the gap smoothly. To accomplish this I had to install a metal shim along the back edge of the ledger board that supports the plywood train board to overcome the effect of a slight bow that has formed over the last six months.


This correction revealed that the bottom board in the little tunnel through the wall was significantly elevated (relatively speaking) as compared with either side. Rather than try to chisel or sand this down I removed the middle section of ties, leaving only a pair at the end to hold the end of the rail in place.


Later on I will disguise the "free floating" track by modeling this hole through the wall to look like this spot is a crossing for a city street over the tracks. Specifically I guess I'll call it Chattahoochee Street, since that only requires a modest adjustment from the crossing in the yard on the prototype railroad, right in front of the TFRR's locomotive shop.


Here's a view of the exact same crossing on Chattahoochee Street in Cornelia today, where you can see that - amazingly - there is a dump truck repair shop (barn red metal building in the center of the photo) in almost the exact same spot as the TFRR's locomotive shop.


Here's a much closer view of Chattahoochee Street, where it is plain that only one track out of five remains. This view illustrates what I will try to achieve with the street crossing, where the street will seemingly extend into the wall. This will be a pretty good dodge if I can pull it off!


The fact that even this one track remains 40 years later is a small miracle, as the rail is still laid only for a few hundred yards further north, then is reduced to naught but the grassy roadbeds so common to fans of the TFRR.

Sunday, May 9, 2010

A Big First Step!


Today our railroad took a big step toward the out-of-doors!

The initial 60 or so feet of mainline will essentially be a shelf layout that runs on the fence, the track mounted on 2x6's that will be supported by sturdy brackets made from 2x4's. All of the trackwork and the brackets are going to be supported by 4x6 timber posts. All wood is pressure treated.

However, because the fence runs right behind a gigantic oak tree whose canopy covers two houses, digging a bunch of holes through the main roots to sink the posts was not an option. Instead I clamped the timbers to the vertical posts of the chain link fence with these cool brackets I found on the Interwebs. To keep the posts out of the way of water and rot, I positioned and leveled a 6" x 9" concrete paver at the base of each chain link fence post to act as foot.


I was working alone, so I used a nylon ratcheting tie-down to strap the top of the timber post to the metal fence post. This made it easy to get everything level and locked into place, then go around to the neighbor's side of the fence to install the brackets.


Here are the results - supporting timbers for all the track from Cornelia northward to the outskirts of Demorest - the first stop on the line.


Now I ache all over.

Friday, May 7, 2010

Can you dig it?


I think garden railroading is uniquely linked to prototype railroading amongst the many scales in that actual digging - and often lots of it - is an integral part of railroad construction.

At our house, the narrow lot means there is only a narrow strip of land between the fence/property line and the edge of the driveway, perhaps 30 inches. This is actually perfect for the railroad. The track only requires clearance of around 6 inches, so there is plenty of space left for sidings, structures and other scene-building elements, kind of like an outdoor shelf layout.

This driveway-side strip of land will represent the North Carolina section of the layout, with the town of Otto to be located directly out the living room window and the northern terminus at Franklin appearing directly across from the front steps:


However, to really make the most of this bit of real estate, control erosion, and generally improve the appearance of this somewhat raggedy monkey grass farm, we are going to build a simple concrete block retaining wall up the whole length of the driveway and tie into an existing wall in the back. Wall height will vary with the slope of the driveway, but the emphasis will be on easy and comfortable sitting along the entire line.

But first, the entire bank has to be excavated back toward the fence enough to allow a 16" wide foundation for the 8" block. Here are some photos of the work progressing toward the back gate, which will mark the Georgia/North Carolina state line on the railroad.


I actually like to dig! During the winter I'll find myself looking forward to the return of warm weather and digging season. Its damn good exercise when done in earnest, which is the only way to make any progress in our combination of red clay and tree roots. A hideous example of the latter is circled in red in this next pic.


Having the right tools is also essential. As far as I am concerned, success in these conditions requires the combined use of four tools: a combination pick-axe/mattock to break up the clay, a short pointed shovel to rough out the hole/ditch, a long-handled square edge shovel to square up the sides and carry out a lot of material, and a heavy digging bar with chisel tip for whenever you need to do some serious heavy hitting. Leave out any one of these and that part of the job slows to a difficult crawl.

The digging bar was a relatively recent revelation for me, a gift of knowledge from my friend John. Its an amazing tool, a 69" solid iron bar with a chisel tip whose 20 pound weight can be used to easily chops through roots and pry out rocks down in the hole where a shovel edge can gain little purchase. On this project, the digging bar allowed me to chop straight through the dense carpet of the monkey grass, then pry the whole root structure up so that big swaths of grass could be literally rolled up like a carpet. The main thing to remember with this tool is to use it vertically, where your strength and the weight of the bar work together. Try to swing this thing in the horizontal and you will soon be exhausted!

Here's a view of the progress from about 2/3 of the way up the driveway, which is about as far as I got before last winter arrived.


Now that pollen season has ended work has resumed. At this point only about 4 feet remain before we reach the "state line"!

Next to be completed:
* I'll have to work my way all the way back down the driveway taking this all down another 10" for the drainage rock and the foundation.
* Build forms for the foundation, which will probably have to be poured in at least a couple lifts due to the change in elevation.
* Build the wall!

I'm hoping to enlist my brother-in-law's help for the foundation pouring and the block laying, as he is an expert in both. For me, once the digging ends it goes back to just being work!

Saturday, April 24, 2010

Making a Hospital and Troop Car for the 7th Calvary


I've always loved the military train sets from the world of tinplate and Lionel, so this was definitely an item on my list of "druthers" for the railroad.

While I knew there were no full-fledged military bases along the line of the TFRR, from an operations standpoint I planned to justify this traffic by having this train serve a reserve unit in one of the towns. I was surprised to discover that not one of the towns had so much as as a National Guard armory! In the course of my research I DID discover that quite a few men from Macon County, North Carolina, were organized into units and sent off to fight Civil War. One of these, the 7th Calvary Battalion, seemed like a nice fit for the classic WWII-era M3 Lee and M4 Sherman tanks that I knew I wanted to model on flat cars.

As for the actual train, USA Trains offers a nice collection of military cars sized for garden railroading, however the modern tanks and humvees did not mesh with the mid-1950's era setting of our TFRR and the prices were quite a bit more than I wanted to pay.

Instead I decided to see if I could find some inexpensive cars on ebay that could be adapted to the purpose. Here is the first of these, an old Kalamazoo-brand passenger/baggage "combine" in 1:24 scale that I won for $24.45, shown here with the trucks and roof already removed.


The first thing I had to do was cut off the bottom step on each corner, as these had already demonstrated themselves to consistently hang on the housing for the throw mechanism that switches the track on the Aristocraft turnouts/switches. In this photo, the steps on the yellow Kalamazoo caboose on the adjoining track have the same problem, so the two cars give a nice "before and after" perspective.


After this came a couple of coats of brushed-on green house paint left over from painting the door to the back porch, thinned with water and mixed with a little black paint to get closer to military olive drab. The house paint immediately eliminates the shiny/slick look of unpainted plastic, so its impossible to do wrong. I intentionally kept the coats kind of light to allow the original plastic red/maroon color to bleed through a little - give it the uneven texture of paint that has been out in the sun and rain for awhile.


I also gave a quick coat to the inside of the car, as well as wash of dilute black paint on the floor to bring out the texture in the molded wood pattern.


There was some discussion about how to utilize the baggage end of the car, including possible designation as a mobile ammo locker, an HQ area and the idea we finally selected - the mobile hospital. This was chosen because the classic red cross on the white field would look so distinctive, while also serving as a reminder of the cost associated with the machines of war.

The circle was traced with a pencil around the cap from a bottle, then painted in free-hand with white paint.


I carefully laid out the red crosses in pencil, but the effort to free-hand the red infill was a disaster, leading to awful, wobbly looking crosses. Like a new barber trying to "fix" a haircut, the crosses got fatter with each attempt to square up the corners. Finally I used a fine tip red Sharpie permanent marker and a ruler to dress the edges, which worked a miracle and cleaned the crosses up quite nicely. Next I used a slightly larger bottle cap and a black Sharpie to fix up the equally unpleasant outer circle you see here.


The end result is that the crosses are still a lot fatter than I would have preferred, but - as usual - from 10 feet away it all looks pretty decent.


Next to be completed on this car will be:
  • Lettering the car with rail reporting marks and "NCNG 7th Calvary Battalion".
  • Installation of a Kadee coupler (the TFRR-standard) on the troop end of the car. By some fluke I found myself with an odd number of Kadee #830's, which I discovered after installing the one remaining coupler I had on hand on the hospital end of the car.
  • Some basic interior detailing, including some benches in the troop end and some bunk beds in the other.
  • Addition of some soldiers! I'm hoping to find some cheap green army men that can be improved with a little detail painting and placed to be visible through the windows of the car.


Here's a look at the new car with the rest of our short military train, which is basically complete except for lettering and detailing.


Valerie, for scale!