Tuesday, December 7, 2010

Track boards complete!


The Cornelia/porch phase of the track boards is all but complete! All that remains is to build the ramp up to the coal dock. And, of course, to lay most of the track.

Here are some photos that show the mainline and the yard areas, as well as the loop around the oak tree.


I love that feeling of heading off into the woods there at the end of the line!

Friday, November 12, 2010

How Trains Stay on the Tracks


In this short clip physicist Richard Feynman explains why trains stay on the tracks. You may be surprised by the reason!


Many thanks to Glenn for passing this along!

Sunday, October 17, 2010

Finishing Up Loose Ends


Receipt of a new box of track has allowed me to wrap up two details:

1. Completion of the Southern Railway depot/interchange track. This will be the arrival and departure track for all passenger trains, as well as a place to park those cars that are being left for the Southern Railway to take out to the wider world and vice versa. I've got 89" of storage here, which is enough for 4 passenger cars or 5 typical freight cars.


The track board here is a 2x8, which leaves 2 inches of clearance (4 scale feet) for a very shallow model of the Southern Railway depot. This scene will include a model of Cornelia's "Big Red Apple", probably to be erected on one side or the other of the train door. In this way I hope to capture this scene:


Notice the second caboose in this photo, located at the far left. That car is parked on the real life TFRR arrival track, as described in the last post.


2. Completion of the TFRR Departure Track. This is the track that will be used to store cars as they are being collected into outgoing trains by the yard locomotive. This track is 128" long, providing enough storage for 7 average freight cars, maybe 8 if some are smaller.


There is plenty of free space on that middle plank to the south of where the two arrival tracks curve away. I am tempted to add a short caboose track here to parallel the departure track, however for the meantime I am deterred by the fact that there will be no easy way to reach it OR the switch.

At the end of the three planks I plan to have a model of the TFRR's office, which was a tiny frame structure that is perfect for the spot. It perfectly fits the operation, too, as you can imagine the conductor stopping in the office to get any final paperwork before the train rolls out toward Franklin.

I haven't been able to find any photos that show what the ends of yard tracks actually looked like in Cornelia, so in the meantime I am using a pair of Bachmann's inexpensive timber and earth bumpers on both of these. As usual, a coat of paint did much to improve the look of them and cut the plastic shine.

Thursday, October 14, 2010

Bridge Complete!


It probably seems like the last month has been occupied by HO scale side projects, but in fact I have also been busy building the bridge that will allow the rails to span the walkway between the porch and the fence.

I had been stuck on the problem of how to support the 90+ degree curves that would be generated by the arrival tracks for Cornelia Yard - the place for inbound trains to be parked for classification and sorting. Mine is the most simple possible: #1 track will hold the inbound train and provide access to the Southern Railway depot through a backing move, while #2 will provide the run-around track for the locomotive to get to either end of the train to either push or pull it. This arrangement duplicates the southern end of the wye found at the junction of the Tallulah Falls and the Southern Ry, highlighted here in blue on a 1922 Sanborn fire map of Cornelia:


Even reduced to two tracks, if I used the same 2x6 and 2x8 planks for the right-of-way the result would be quite heavy, with more weight added by whatever would be used to tie the angled boards together. And the presence of the pathway underneath eliminated the option of adding support from below.

At long last I was inspired by a paleo-railfanning trip to the Central of Georgia Railway's bridge over the Apalachee River, which still stands proudly on a forgotten, tree-grown section of the track between Madison and Athens.


The timber decking revealed the solution! The ability to deck my bridge with small timbers would allow me to use a couple of light beams to support both curved tracks with one deck with no planks at all.

To see where exactly to put it, I once again used the incredibly valuable trick of bending that 1/2" plastic conduit around to reveal exactly where the tracks will need to go and the curves they will follow. This allowed me to put the beams more or less right underneath them.


I used 2x4 lumber for both beams, standing them on edge and bolting them to all three track boards along the fence, then notching them with a jigsaw and chisel to allow them to be supported by the handrail of the deck. The longer beam in the foreground of the next photo stretches all the way back to the right-of-way where it first emerges from the porch, providing additional cantilever support.


As a bonus, the short section of the beam between the handrail and the porch provides a way to support the south ends of the plank rights-of-way that will support arrival tracks #1 and #2 after they come off the timber trestle, thus solving what was going to be the next puzzle in this project.

The actual timbers proved to be more problematic! Test cuts of the 1x2 and 2x2 lumber available at Home Depot were disappointing. Not only were they not quite the same height as the planks, which would generate a distinct change in elevation, but eventually we realized that the dimensional lumber just didn't look right. Both the 1x2 and 2x2 had significantly rounded corners, while the timbers on the railroad bridge are sharp and square.


And so I finally broke down and bought the least expensive table saw available, assembled it, read the manual, then immediately set about ripping 2x6 lumber into nice square-edged timbers that were 1" wide. Here you can see the comparison with the Home Depot 1x2.


Despite the amazing low price of the saw and my jitters about using it, the whole thing was a snap and the Riyobi purred like a kitten.

The decking process went quickly from there. I cut each timber to be 3" longer than either the edge of the track or the edge of the supporting beam, whichever was longer. I used another piece of the timber as a spacer between each new timber added and the one before it, ensuring perfect spacing and evenness between them.

I am really pleased with the results!


I love it when a plan comes together!

A Side Project to the Side Project

I decided to make a supplementary display for highlighted items and singletons that do not fit with the rest of the fleet using some short pieces of trim that were left over from making the main display. This was super simple. I just cut them all the same length and screwed them together with some old tomato stakes I found in the garden shed.


I painted the resulting ladder with white primer, followed by a coat of some dark green paint I found in the crawlspace. At first I was alarmed to find out that the dark green paint had gone south to some degree, but the effect was actually kind of interesting - a textured "antique" look.


I thought the results were ok, so I ran with it. Here's what this corner looks like now that both displays are complete.

Tuesday, September 14, 2010

Side Project: Display for HO Fleet


While some have been sold on ebay or at swap meets since the switch to G scale, I still have quite a few HO scale models hidden away here and there left over from what was going to be my dream layout but never got past the armchair phase due to a lack of space. (Scroll to the bottom of this page for details.) Having recently seen Toy Story 2 again for the first time in many years, I was struck by how much the toys hated being put away in boxes, away from the light of day. I began to feel sad for all my poor rail cars stuffed away in drawers and boxes and decided to build a simple display cabinet so we could all enjoy each others company.

Here's the basic frame, which was made from 1"x4" pine and attached directly to a 36" by 68" piece of 1/8" masonite hardboard, which would fit perfect in the spot above my bedroom dresser. I got the folks at Home Depot to cut the masonite on their large panel saw, which ensured the cuts would be square and perfect.


All the painting was done before assembly. The masonite was painted concurrently with the blue sky for Cornelia Yard, while the frame and shelf pieces were painted with primer and then some leftover brown paint.

The shelves are 2" wide casing material (baseboard trim) that are turned so that the side that is usually mounted flat against the wall is instead facing upward. This side that is usually the back has a couple of grooves running down the length that are slightly too wide to be an exact fit for HO wheelsets, but is close enough to trap the wheels and prevent any danger of the cars rolling off.

Using a trick I learned from my friend Landus, I cut three blocks to ensure the correct spacing between each shelf - 3.25 inches to squeeze eight shelves into a 34.5 inch space. (The flat edge of each shelf also used up a little less than 0.75 inches.) Each shelf was nailed in place from each end using finishing nail. I pre-drilled each hole to make sure that the nails would go exactly where I wanted them without any possibility of splitting the wood.


Once the ends were secure, I put a couple of #4 screws into each shelf from the back to stabilize them and tie them to the back panel. I made parallel pencil lines across the back to make sure I hit the shelves correctly. Pre-drilling all the holes once again ensured the screws went where I wanted them.


Here's the display with all shelves installed.


Next I added two vertical rails of 1"x4" to actually support the display on the wall. Instead of spacing them evenly, I used a stud finder to locate the studs in the wall where this display will be mounted, then positioned the rails accordingly.


Here's the display in position for mounting. Note the weight is all supported by a motley collection of ammo boxes, blocks of wood and shims at the bottom to get it to the correct height and level without my having to support the weight of the thing.


All done! Almost all of my HO cars on display, as well as a small set of "O" scale tinplate trains made by ETS that we picked up some years ago during a trip to Prague. They, too, have been in a box for 10 years and seem very happy to be out in the light of day in their new position on top of the display.


I know I am delighted to have them all out! Over and over I find myself staring happily at all these rail cars for long periods of time since the project was complete - hypnotized, almost.

Monday, September 6, 2010

Blue Skies for Cornelia Yard

This was a relatively quick and easy project, inversely proportional to how long it has taken to get it done.

"Before", with masking and drop cloth in place:


The blue and white paints were both from the "random quarts of paint" shelf in the crawlspace. The blue was a little too deep and needed lightening with the white, then a little white was swirled back through to make wisps of clouds. I think I may have overdone this on the short wall. I may go back and "blue that over" a bit more next time I've got the can open.


What was the nice was the complete lack of a need for a crisp line or any care at all on four sides since I knew those borders would be covered by the trim. I just had to stay within 3.5 inches of the pencil line that I had made with a level.

Its amazing how the trim board really defines the two spaces - the lower as part of the rail scene, the upper as a part of the porch. The height of the trim board is such that we have the option of installing above it a row of 28 inch tall cabinets over Cornelia Yard. This would be a huge increase in new storage space harvested for the residence - a place for sleeping bags, tents and cooler chests. Having a "ceiling" of cabinets would give this scene a diorama-like quality, which could be very cool if done well.


We got visits from some railroad inspectors.


The finished result! Its a huge improvement and a giant step forward in terms of defining this scene.

Thursday, September 2, 2010

A Tangent and a Curve


Today I got the roadbed mounted for the tangent track that will allow the oak tree circle to serve as a return loop - a teardrop shape that allows trains to be turned and sent back the way they came. Here's a ground level view looking north across the switch. The straight leg heads north - the return leg. The curve to the right heads around the tree.

On the south side of the tree I trimmed and attached the supporting plank for the first section of the #1 Cornelia arrival track, then mounted the plastic conduit that magically reveals exactly where the bridge over to the house needs to be.


Perhaps more importantly for smooth operation, the conduit automatically bends itself into these curves with perfect spiral easements - transitional curves between straight tracks and fixed-radius curves. These were proposed as the early as 1828 for track laying but did not become standard until locomotives began to move at speeds high enough for these spiral easements to matter.

On the tight curves in the Cornelia Yard area of the TFRR these easements will allow the trains to move more smoothly with less binding and less chance for derailments. This is especially important in the flattened "S" shaped curve at the bottom of this photo, between the two switches.


The switch sitting by itself in the middle of the photo designates where the #2 Cornelia arrival track will peel off. Arrival #2 will serve as the "run-around track" for Cornelia yard - a parallel track that allows a locomotive to move to either end of a string of cars as needed. The #2 track will run parallel to #1, a second curve over the walkway toward the house.

Saturday, August 28, 2010

Will the Circle be Unbroken!


Today I finished the ring of roadbed around the big oak tree. There was nothing like this particular feature anywhere on the TFRR, however for us it will provide the ability to have a train running on "autopilot" in the deck/porch area, as well as provide service as a reversing loop once the line is complete.

The ring is an octagon made with 2x6s for the diagonals and 2x8s for the straight sections.


In this photo you can see the ring of 1/2" plastic conduit that I used to get the circle right, a tip gleaned from the pages of Garden Railways magazine. The plank leading off to the lower left shows the approximate location of the return leg of the reversing loop. Finalizing and attaching this return leg is next on the list of things to do.


The new work has already been approved by the cat department.

Wednesday, August 25, 2010

Onward toward Manifest Destiny!


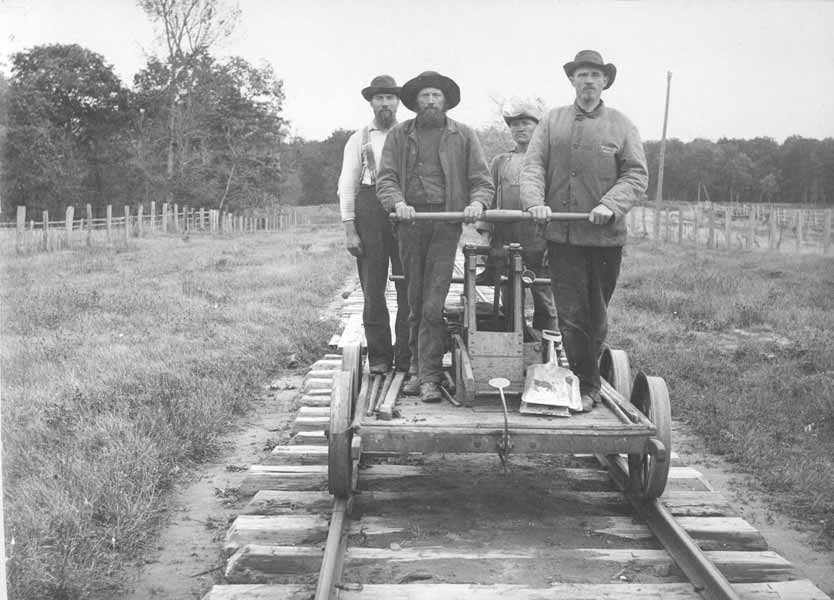
I love this photo of folks out on a railbound expedition! It looks like they are rolling off over the mountain on a sled, but closer scrutiny reveals this to be a speeder - a motorized version of the classic lever-operated hand car with which everyone is familiar.


You can try one for yourself at the Nevada State Railroad Museum in Carson City!


,

Tuesday, August 17, 2010

Last Fleet of GE 70 Tonners Retired


The June issue of Trains magazine reported that the last "substantial" fleet of General Electric 70-Ton locomotives has been retired from California's Modesto & Empire Traction Company, where the oldest of them - #600 - has seen 63 years of continuous service. The tenacious little 660 horsepower diesel switchers were no match for modern high-efficiency railroading, where the M&ET was having to use as many as seven of the tough little locomotives at a time to move 100-car unit trains of grain to transcontinental giants Union Pacific and Burlington Northern Santa Fe.

They were replaced by R.J. Corman Railpower RP20BD genset locomotives, which can pull the same size trains with just three locos. Genset locomotives ingeniously replace the single huge engine typically found in a diesel-electric locomotive with two to four much smaller engines that are brought on and off line by a controlling computer as horsepower is needed. The result is a tremendous increase in efficiency and environmental performance.

The M&ET is offering all but one of their venerable 70 tonners for sale to good homes if any of you has $95,000 burning a hole in your pocket. Understandably, they are keeping #600 for nostalgic reasons.

And while this was the last fleet of GE 70 tonners, there are still many singletons and pairs switching industrial sites and shortline railyards around the western hemisphere. The TFRR's own 70 tonners - #501 and #502 - were purchased in 1948 and run until the demise of the line in 1961, but I have never heard any details of their movement and/or disposition from there. Wouldn't it be something if either of them was still in service today!

Friday, August 6, 2010

Roadbed Progress!


Just a couple of quick photos here that show the first run of "roadbed" along the fence. Now that this is complete we can build the loop around the big oak tree and the bridge that will come over the pathway to join the roadbed that currently extends from the portal into the screen porch.


Wednesday, July 21, 2010

The End at Last for Texaco in Clarksville?


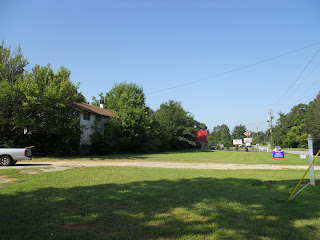
One of the remaining structures from the days of the railroad is a defunct Texaco dealership located just south of Clarkesville, currently found on the side of Georgia Highway 385, also called "Historic US-441". At the risk of sounding like Grandpa Simpson, when I was a kid this was THE road to Rabun County... now its "historic".

Here it is in a photo of a photo taken in Dess Oliver's TF museum in Rabun Gap, followed by a current photo of the same place where the old tanks have snoozed in the bushes for many years.


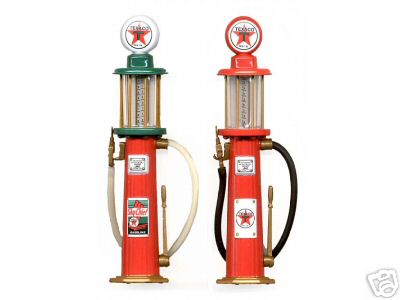
I have definitely been planning to model this facility with Clarkesville thanks to its simplicity and charm - a couple of pineapple juice cans will make great tanks, and I've already found an inexpensive Texaco tank car by Bachmann and a set of cool 1:25 scale Texaco gas pumps for the retail side of the operation .


So I was saddened the other day to come by and find one of the big horizontal tanks gone and the remaining tank strapped to a low-boy trailer - destined I suppose for sale or the scrapyard. This may be a one-off sale of these tanks, or possibly the first step is dismantling this little relic of the TFRR to make space for a burger joint, or perhaps a shop where the citizens of Clarkesville can buy lottery tickets and beer. You know, something important.


Here's the "before and after":