
It probably seems like the last month has been occupied by HO scale side projects, but in fact I have also been busy building the bridge that will allow the rails to span the walkway between the porch and the fence.
I had been stuck on the problem of how to support the 90+ degree curves that would be generated by the arrival tracks for Cornelia Yard - the place for inbound trains to be parked for classification and sorting. Mine is the most simple possible: #1 track will hold the inbound train and provide access to the Southern Railway depot through a backing move, while #2 will provide the run-around track for the locomotive to get to either end of the train to either push or pull it. This arrangement duplicates the southern end of the wye found at the junction of the Tallulah Falls and the Southern Ry, highlighted here in blue on a 1922 Sanborn fire map of Cornelia:

Even reduced to two tracks, if I used the same 2x6 and 2x8 planks for the right-of-way the result would be quite heavy, with more weight added by whatever would be used to tie the angled boards together. And the presence of the pathway underneath eliminated the option of adding support from below.
At long last I was inspired by a paleo-railfanning trip to the Central of Georgia Railway's bridge over the Apalachee River, which still stands proudly on a forgotten, tree-grown section of the track between Madison and Athens.


The timber decking revealed the solution! The ability to deck my bridge with small timbers would allow me to use a couple of light beams to support both curved tracks with one deck with no planks at all.
To see where exactly to put it, I once again used the incredibly valuable trick of bending that 1/2" plastic conduit around to reveal exactly where the tracks will need to go and the curves they will follow. This allowed me to put the beams more or less right underneath them.

I used 2x4 lumber for both beams, standing them on edge and bolting them to all three track boards along the fence, then notching them with a jigsaw and chisel to allow them to be supported by the handrail of the deck. The longer beam in the foreground of the next photo stretches all the way back to the right-of-way where it first emerges from the porch, providing additional cantilever support.

As a bonus, the short section of the beam between the handrail and the porch provides a way to support the south ends of the plank rights-of-way that will support arrival tracks #1 and #2 after they come off the timber trestle, thus solving what was going to be the next puzzle in this project.
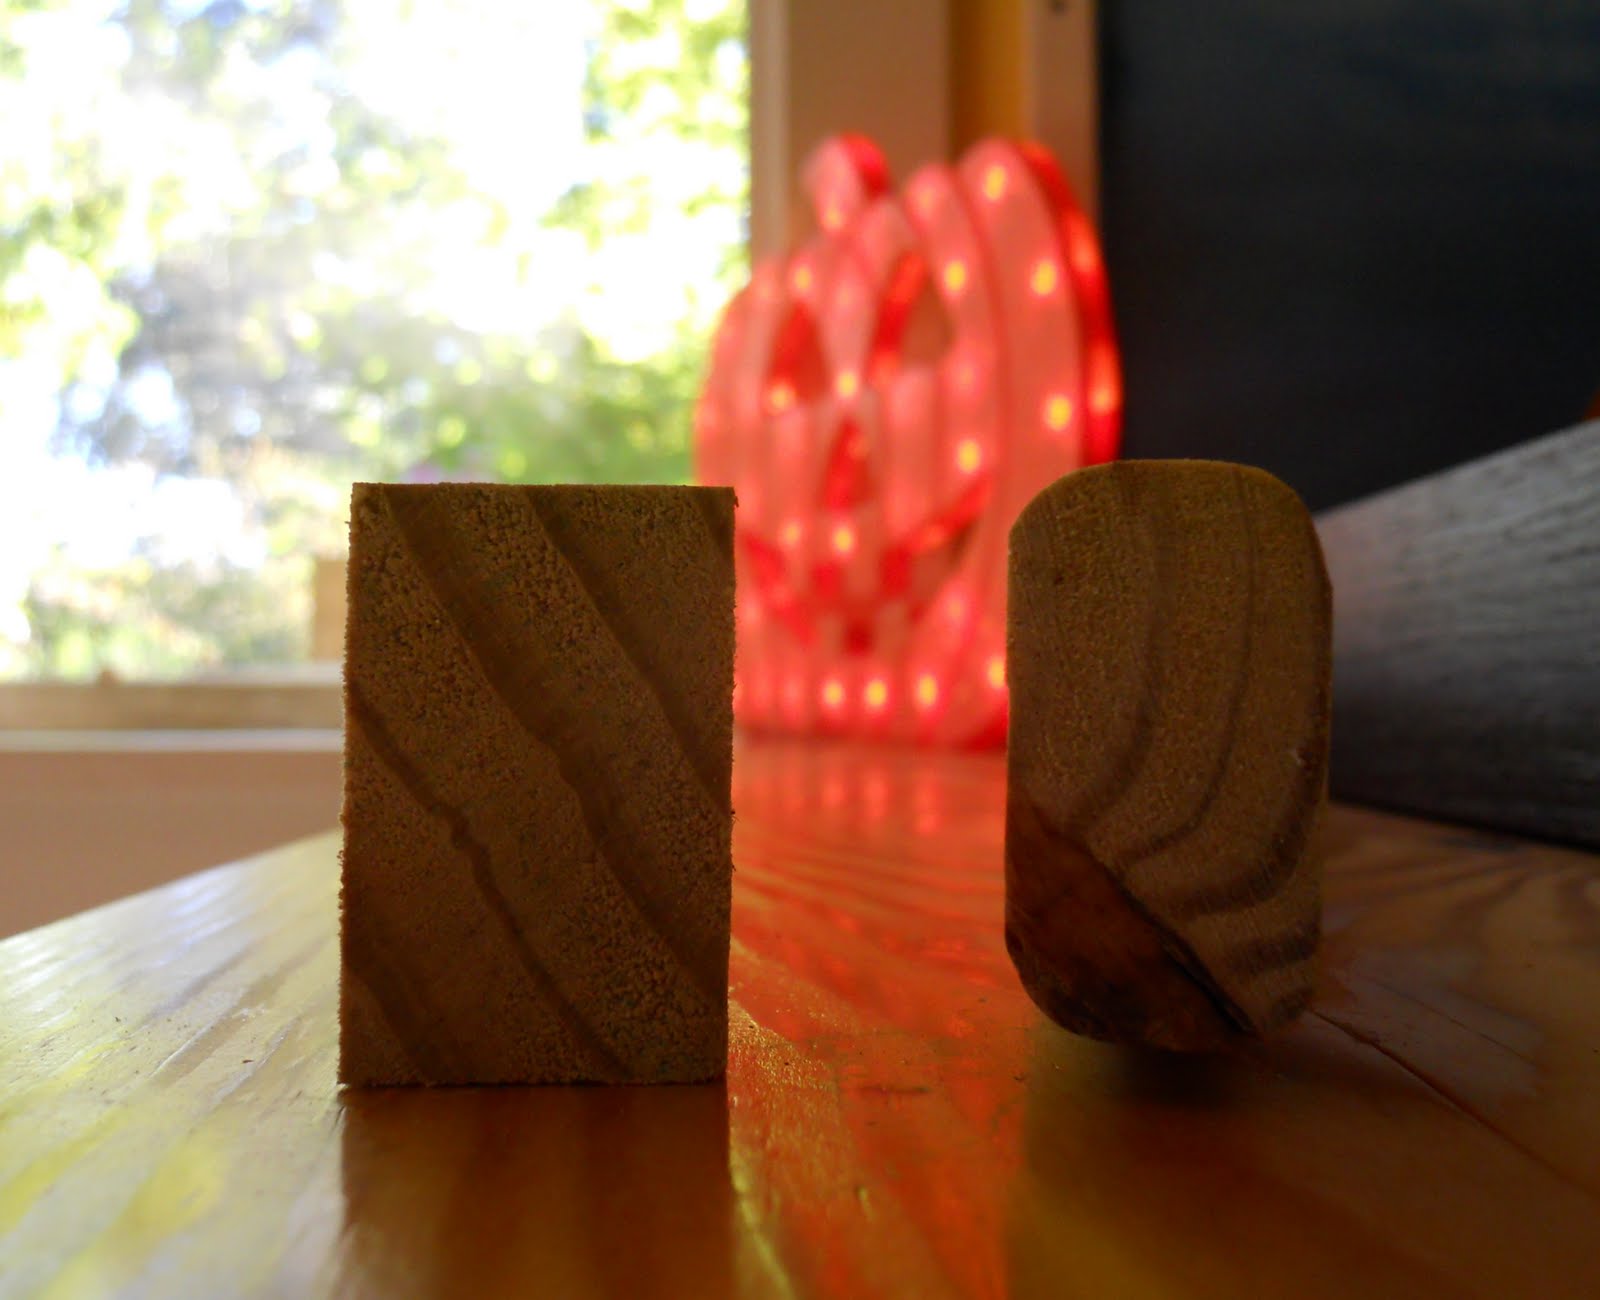
The actual timbers proved to be more problematic! Test cuts of the 1x2 and 2x2 lumber available at Home Depot were disappointing. Not only were they not quite the same height as the planks, which would generate a distinct change in elevation, but eventually we realized that the dimensional lumber just didn't look right. Both the 1x2 and 2x2 had significantly rounded corners, while the timbers on the railroad bridge are sharp and square.

And so I finally broke down and bought the least expensive table saw available, assembled it, read the manual, then immediately set about ripping 2x6 lumber into nice square-edged timbers that were 1" wide. Here you can see the comparison with the Home Depot 1x2.
Despite the amazing low price of the saw and my jitters about using it, the whole thing was a snap and the Riyobi purred like a kitten.
The decking process went quickly from there. I cut each timber to be 3" longer than either the edge of the track or the edge of the supporting beam, whichever was longer. I used another piece of the timber as a spacer between each new timber added and the one before it, ensuring perfect spacing and evenness between them.
I am really pleased with the results!


I love it when a plan comes together!
No comments:
Post a Comment